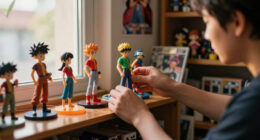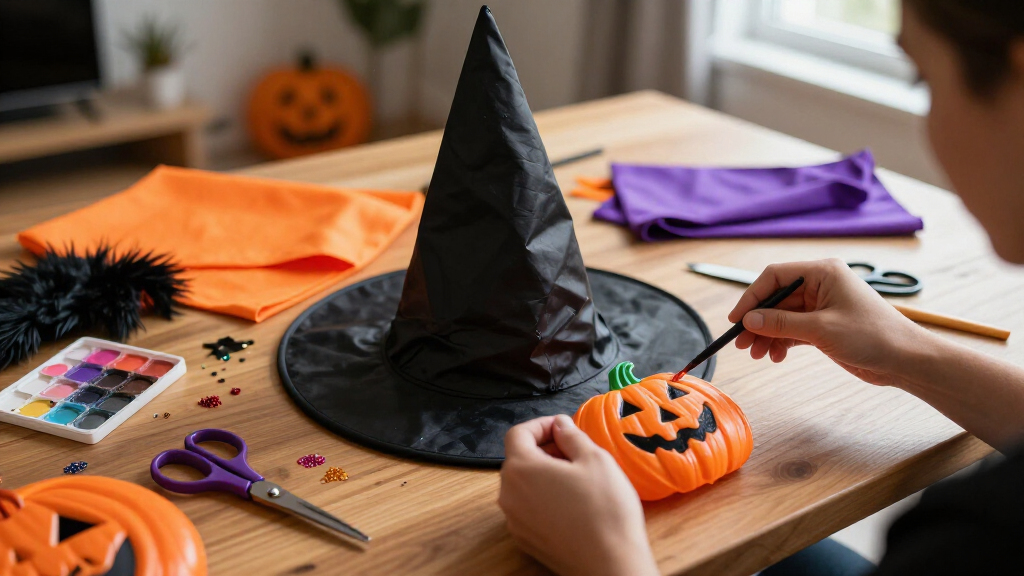

This guide walks you through making and assembling Halloween costume accessories — hats, props, jewelry, wings, belts, and other finishing pieces — so your costume reads clearly and stays wearable all night. You will decide which accessories your costume actually needs, gather affordable materials, build or customize each piece, and do a full wear-test before the event. This guide is written for beginners with no sewing or crafting experience required. Expect roughly two to four hours of hands-on work depending on how many pieces you build, plus a shopping trip or online order for materials. By the end, you will have a complete accessory set that fits, stays put, and survives a full evening of parties or trick-or-treating.

Get movie nights delivered free — and shop member deals
- Fast, free delivery on millions of items
- Access to Prime Big Deal Days deals on October 6–7
- Prime Video, Amazon Music and more included

CICOCI Pirate Costume Accessories Set for Adults
- ✔ Brand: CICOCI
- ✔ Included Components: Bandana, large sash, bracelet, necklace, eye patch, earring
- ✔ Material: Linen and cotton
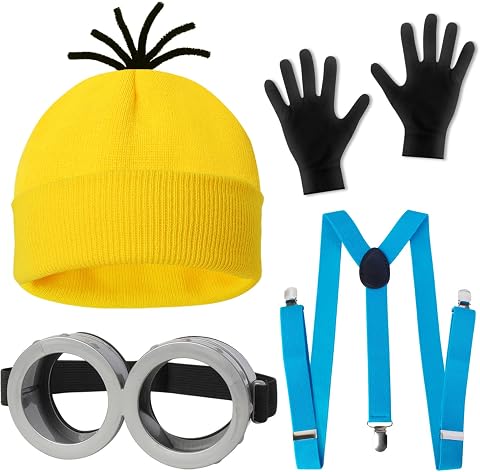
CONGRU 4-Piece Halloween Costume Set for Adults
- ✔ Set Includes: Yellow beanie, goggles, suspenders, black gloves
- ✔ Fabric Type: Polyester
- ✔ Material: Polyester, plastic, foam

SHELYEXIEN Halloween Temporary Eye Tattoos, 7 Sheets
- ✔ Brand: SHELYEXIEN
- ✔ Quantity: 7 sheets
- ✔ Designs: Cats, skulls, bats, spider webs, and other horror motifs
Difficulty: Beginner | Time: 2-4 hours (plus shopping time)
What You’ll Need
Tools & Materials:
- Hot glue gun and glue sticks
- Scissors and a craft knife
- Measuring tape
- Needle and thread (or fabric glue)
- Wire cutters and pliers (for wired props like wings or antennae)
- Paintbrushes and acrylic or spray paint
- Hair dryer or heat gun (for shaping EVA foam or thermoplastics)
Knowledge:
- Basic hand safety around hot glue and craft knives
- Rough familiarity with your costume’s character or theme
- No prior crafting or sewing experience needed
Gather materials before you start building. A typical accessory project uses: EVA foam sheets or craft foam, cardstock or cardboard, felt, elastic bands and ribbon, a headband, safety pins, velcro strips, and whatever base items you are customizing (plain hat, toy weapon, sunglasses). Thrift stores and dollar stores cover most of this for under $20 in most cases. Work in a ventilated area if using spray paint or hot glue, and cover your work surface with newspaper or a cutting mat.
CICOCI Pirate Costume Accessories Set for Adults
This set earns our top spot because it solves the biggest problem in Halloween accessorizing: looking coordinated rather than pieced together. With six matching pieces — bandana, sash, bracelet, necklace, eye patch, and earring — you get an instant pirate identity without hunting for individual items. Compared with the CONGRU set, which leans on a single joke, the CICOCI kit builds a fuller silhouette around whatever dark clothing you already own.The standout detail is material choice. The bandana and sash use linen and cotton with seamed edges, which feels noticeably more authentic than the plastic goggles and foam in the CONGRU set. That matters most for stage performances or cosplay, where close inspection and photography reveal cheap materials quickly. The oversized sash, at roughly 137 inches long, wraps generously and gives the costume real visual weight.The tradeoffs are real, though. The bandana and sash dimensions are unusually large, so measure before buying — smaller wearers may need to tie or layer them creatively. And the set includes only a single earring, which limits the mismatched-earrings pirate look some buyers expect. Still, for pure transformation-per-piece, nothing else in this lineup matches it.
Pros:
- Six coordinated pieces create a complete pirate look without extra purchases
- Linen and cotton fabrics with seamed edges feel more authentic than plastic alternatives
- Generously sized sash adds visual impact to any outfit
- Versatile enough for Halloween, cosplay, themed parties, and stage use
Cons:
- Unusually large bandana and sash dimensions need verifying before purchase
- Includes only one earring
- Fabric pieces will need washing and care after wear, unlike disposable accessories
Best for: Adults who want a complete, coordinated pirate look for Halloween parties, cosplay events, or stage performances without assembling pieces separately
Not ideal for: Buyers who need guaranteed sizing — the free-size bandana and sash dimensions require checking, and petite wearers may find the pieces oversized
Bottom line: This set delivers the most complete and cohesive costume transformation of the three, with fabric quality that holds up beyond a single night.
“This set delivers the most complete and cohesive costume transformation of the three, with fabric quality that holds up beyond a single night.”
CONGRU 4-Piece Halloween Costume Set for Adults
Where the CICOCI set aims for authenticity, the CONGRU kit goes squarely for laughs. The formula is simple: a yellow beanie, goggles, suspenders, and black gloves layered over a T-shirt and jeans, and you have an instantly recognizable character costume in under a minute. For buyers who dread elaborate costume planning, this is the lowest-effort entry point in our lineup.The stretchy polyester and adjustable straps make it genuinely wearable, and the one-size-fits-most sizing covers both adults and kids, which the pirate set does not. That family flexibility is a genuine advantage if you’re coordinating costumes across ages. Compared with the tattoos, this set creates impact from across a room — hats and suspenders read visually at party distance in a way face detail simply can’t.The compromises come down to durability and fit extremes. The goggles are plastic, so they feel closer to a novelty than the seamed fabric of the CICOCI pieces, and very large frames may find the one-size sizing tight. But if the goal is one funny night rather than a reusable stage costume, those tradeoffs are easy to accept.
Pros:
- Instant recognizable costume when paired with a plain T-shirt and jeans
- Stretchy, comfortable materials with adjustable straps for a secure fit
- One size fits most adults and kids, making it great for family costumes
- Funny, eye-catching look with strong visual impact at party distance
Cons:
- One-size sizing may not fit very large individuals
- Plastic goggles are less durable than fabric-based accessories
- The joke is specific — less versatile than a pirate or neutral theme
Best for: Costume-averse adults and teens who want a funny, recognizable outfit built from clothes already in their closet
Not ideal for: Very large-framed wearers, or anyone wanting durable accessories they can reuse across multiple years and events
Bottom line: The easiest laugh-per-effort purchase here: it converts everyday clothing into a full costume in minutes, as long as the one-size fit works for you.
“The easiest laugh-per-effort purchase here: it converts everyday clothing into a full costume in minutes, as long as the one-size fit works for you.”
SHELYEXIEN Halloween Temporary Eye Tattoos, 7 Sheets
Not every Halloween shopper needs a costume — many need the details that make one convincing. These seven sheets of temporary tattoos cover the classic horror vocabulary: cats, skulls, bats, and spider webs, all applied with water in 10–20 seconds and removable with alcohol or body oil. It is the only product in this lineup with zero fit risk, which makes it the safest purchase of the three.Its role is different from the other two, and that distinction matters. The CONGRU and CICOCI sets are complete transformations; the SHELYEXIEN tattoos are an enhancement layer. Pair them with the pirate set for a weathered, sunken-eyed look, or use them alone with dark clothing for a minimalist spooky effect. That flexibility across costumes is something neither fabric set can offer, since their themes are fixed.The obvious limitation is longevity: 3–5 days of wear means this is a disposable product, not an investment. We’d also note the listing doesn’t specify how many tattoos per sheet or their sizes, so plan designs loosely rather than expecting a precise count. If you need a costume that photographs well days in a row, the waterproof claim helps, but for anything beyond the holiday weekend, the fabric sets are the better buy.
Pros:
- Zero fit risk — works for every age, size, and skin tone
- Quick 10–20 second water application with no makeup skills required
- Waterproof wear lasting 3–5 days holds up through parties and photos
- Removes easily with alcohol or body oil
Cons:
- Wear time is limited to 3–5 days, making this a disposable purchase
- Number and size of tattoos per sheet is not clearly specified
- Adds detail only — cannot carry a costume on its own
Best for: Costume-wearers of any age or size who want quick, spooky face and body detail without fit concerns or wardrobe commitment
Not ideal for: Anyone seeking a standalone costume or a reusable accessory — these are single-event details, not a transformation
Bottom line: The best low-risk finishing touch in this lineup: universal, fast, and versatile, provided you treat it as a detail rather than the costume itself.
“The best low-risk finishing touch in this lineup: universal, fast, and versatile, provided you treat it as a detail rather than the costume itself.”
As an Amazon Associate we earn from qualifying purchases.
Before You Start
Decide on your costume concept before buying anything. Look at reference photos of your character or theme and write down every visible accessory — this becomes your build list. Rank each item as essential (the costume fails without it), helpful (improves recognition), or optional (skip if time runs short). A costume with two or three well-made essential accessories always looks better than one buried under six rushed ones.
Check your event conditions: indoor party, outdoor trick-or-treating, or crowded venue. This affects material choices — foam and fabric survive crowds better than papier-mâché, and anything with sharp edges or long protrusions should be softened or shortened for tight spaces. Also confirm the date you need the costume finished by, and order any online materials at least two weeks ahead to allow for shipping delays.
Safety notes: hot glue burns are the most common injury in accessory making — keep a bowl of cold water at your workstation. If the costume is for a child, avoid small detachable parts that could be swallowed, and skip anything that restricts vision or breathing.
Step-by-Step Instructions
Step 1: List every accessory your costume needs
Open reference photos of your character or theme and write down each visible accessory item on paper. Note each item’s size, color, and where it sits on the body (head, hands, waist, back) next to its name. Mark each one as essential, helpful, or optional. Circle the essentials — these are your build list.
Tip: If your costume is a generic theme (witch, pirate, vampire) rather than a specific character, pick the three most recognizable items for that archetype — a witch needs a hat and broom before anything else.
Check: You have a written list of 3-6 items with at least two marked essential, and you know what each one looks like.
Step 2: Decide: buy, thrift, or build each item
Label each accessory on your list with a B (buy cheap), T (thrift), or M (make). Apply this rule of thumb: buy simple monochrome items like gloves or tights; thrift structural items like belts, boots, jackets, and hats; make anything highly specific to your character that stores won’t stock. Write your shopping list from the B and T items and your materials list from the M items.
Tip: Check your own closet first — a plain black belt, old jewelry, or a forgotten hat often covers an item you were about to buy.
Check: Every list item has a B, T, or M label, and you have a single combined shopping list.
Step 3: Gather materials and set up your workspace
Collect everything on your shopping and materials lists and place it on a cleared, covered table. Plug in your hot glue gun on a heat-safe surface. Lay out tools (scissors, measuring tape, needle and thread) and materials in the order you will use them. Set a bowl of cold water within reach for glue burns.
Tip: Group materials by accessory — all hat supplies together, all prop supplies together — so you can finish one item completely before starting the next.
Check: Every material on your list is on the table, and your glue gun takes 3-5 minutes to heat up while you organize.
Step 4: Build or customize the headpiece first
Start with the headpiece because it anchors the whole look. Customize a bought hat or headband by attaching decorations (foam shapes, feathers, ribbon) with hot glue, holding each piece in place for 10 seconds until set. Build a headpiece from scratch by cutting your base shape from cardstock or craft foam, reinforcing it by gluing it to a headband or elastic band, then decorating. Try it on between attachments to check placement.
Tip: Glue decorations to a headband in a mirror while wearing it — marking placement with a pencil dot first — so the piece sits where you planned rather than where you guessed.
Check: The headpiece stays on through head-shaking and light bending without falling off or pinching.
Step 5: Build hand-held props
Make or upgrade your character’s prop — wand, weapon, broom, scepter, staff. Build from scratch by cutting the main shape from cardboard or EVA foam, gluing layers together for thickness, then painting with two thin coats of acrylic, letting each coat dry for 20-30 minutes. Wrap the grip end in ribbon, faux leather, or hockey tape for a comfortable hold. Upgrade a cheap toy prop by sanding the surface lightly, repainting, and adding detail with paint or glued-on craft pieces.
Tip: Keep props under 90 cm (36 inches) for parties — anything longer catches on doorways and other people. Round or soften all pointed tips with sandpaper or a dab of hot glue covered in paint.
Check: You can hold the prop comfortably in one hand for several minutes, and it survives being set down and picked up repeatedly.
Step 6: Create wearable accessories: belts, jewelry, wings
Construct belts and sashes by cutting foam or fabric to size plus 10 cm of overlap, then closing with velcro strips or safety pins rather than permanent glue so they adjust over your costume. Make jewelry and badges by cutting shapes from craft foam, painting them, and attaching to ribbon or an existing chain. Build wings or large back pieces by framing them from wire or cardboard, covering with fabric or painted foam, and attaching elastic shoulder loops sized to your body — measure over your shoulder and back before cutting the elastic.
Tip: Use velcro or safety pins for anything worn over clothing. Glued closures fail when costumes stretch, and you cannot adjust them on the night.
Check: Each wearable piece goes on and comes off without help, and nothing digs into your skin or slides around when you move.
Step 7: Paint, weather, and seal all pieces
Lay out all accessories and apply final paint in thin coats, working from light to dark colors. Add weathering — light dry-brushed gray or brown along edges — if your character looks worn or battle-tested. Let everything dry fully, at least one hour for acrylic. Seal any prop that will be handled all night with a clear spray sealant or a brush-on mod podge layer, applied in a ventilated area.
Tip: Dry-brushing means wiping most paint off the brush on scrap paper first, then lightly dragging it across edges. Less paint is always better — you can add more, but you cannot take it off.
Check: Paint does not rub off on your fingers when you press and drag a fingertip across each piece.
Step 8: Do a full wear-test with the complete costume
Put on the entire costume with every accessory attached. Walk around your home for ten minutes, sit down, raise your arms, climb stairs, and hug someone if you can. Check a full-length mirror from all sides. Fix anything that falls off, pinches, blocks your vision, or snags immediately with better fasteners, padding, or trimming.
Tip: Take photos in normal indoor lighting, not just costume lighting. Photos reveal asymmetry, loose pieces, and color mismatches your eye skips over in the mirror.
Check: You can walk, sit, and move your arms freely; nothing falls off; and photos show the costume reads clearly from ten feet away.
Step 9: Pack and store the accessories for the event
Wrap delicate pieces in tissue paper or bubble wrap and box or lay them flat. Place small items like jewelry in a labeled zip bag tucked inside your shoe or hat so nothing gets lost. Pack a small repair kit: mini glue gun or super glue, safety pins, spare velcro, and a travel paint pot in your main costume color. Load everything into the car or bag the night before, not the morning of.
Tip: Photograph the fully packed bag. At the venue, you can check the photo to confirm you brought every piece.
Check: Everything fits in one bag or box, the repair kit is packed, and nothing is crushed or bent in storage.
Common Mistakes to Avoid
- Over-accessorizing until the costume is unreadable — Stick to your essential list of two or three signature pieces. If a new item does not make the character more recognizable, leave it out.
- Gluing attachments directly to skin-tight costume pieces or using permanent closures on wearable items — Use velcro, safety pins, or elastic for anything worn on the body. Save glue for props and decorations only, so pieces can be adjusted or removed.
- Skipping the wear-test and discovering failures at the party — Always do the ten-minute movement test in step 8. Most accessory failures — falling wings, pinching headbands, snagging props — show up within minutes of real movement.
- Building oversized or sharp props that get banned or broken at the venue — Keep props under 90 cm, soften all points, and check venue rules for prop restrictions before you build. Many events prohibit realistic weapons entirely — bring stylized or clearly fake versions.
Troubleshooting
Problem: Hot glue won’t stick to foam, plastic, or satin fabric
Solution: Roughen slick surfaces with sandpaper before gluing, and use high-temperature glue sticks if your gun supports them. For satin and synthetic fabrics, switch to fabric glue or E6000 — hot glue melts through thin synthetics and peels off slick ones.
Problem: A headpiece or hat keeps slipping off during wear
Solution: Sew or glue two small combs or bobby-pin loops inside the brim, or run a thin elastic chin strap from side to side. For heavy headpieces, redistribute weight by attaching them lower on the forehead rather than balancing on the crown.
Problem: Paint rubs off on hands, walls, or clothing
Solution: The paint was applied too thickly or not sealed. Let the piece dry fully overnight, apply one thin coat of clear sealant, and repeat the fingertip rub test. For quick fixes at the venue, dab clear nail polish over the worst spots.
Problem: Wings or a back piece sag, twist, or pull the costume backward
Solution: The frame is too heavy or the straps are too far apart. Add a second cross-strap around the chest or waist to anchor the load, shorten the shoulder loops, or rebuild the frame in lighter material — cardboard and fabric instead of foam board.
What Success Looks Like
Your accessory set is complete when all of the following hold true. Every item on your essential list exists and is finished. The headpiece stays on through normal movement. Hand props are comfortable to hold, blunted at the tips, and sized for the venue. All wearable pieces attach with adjustable fasteners and go on without assistance. Paint passes the fingertip rub test with no transfer. You have completed the full ten-minute wear-test in the complete costume with no falls, snags, or pain, and photographs from ten feet away show a costume that reads instantly as your character. Finally, everything packs into one bag with a small repair kit, ready for the event.
Next Steps
After the event, extend the life of your work. Wipe down props, spot-clean fabric pieces, and store everything flat in a box with silica gel packets to prevent mildew — foam and painted pieces last several seasons stored this way. Photograph and catalog your accessories so next year’s costume can reuse pieces. If you caught the crafting bug, level up with EVA foam heat-shaping, thermoplastic (Worbla) props, or LED inserts for glowing effects. If a piece failed badly during the night, note why on your build list — those notes are the starting point for the next costume. For complex builds like armor or animatronics, look into prop-making communities and local maker spaces, which often loan tools like heat guns and sewing machines.
Frequently Asked Questions
How far in advance should I start making Halloween costume accessories?
Start planning three to four weeks out if you need to order materials online, since shipping delays are the biggest schedule risk. The hands-on build itself takes two to four hours for a typical accessory set, spread across a couple of evenings to allow paint and glue to dry overnight.
What is the cheapest way to get good accessories?
Thrift stores and dollar stores cover most needs for under $20: plain hats, belts, gloves, and toy props that repaint beautifully. Add one or two craft-store items like foam sheets and a glue stick multipack, and prioritize your spending on the single most recognizable accessory rather than spreading the budget thin.
Are there rules about props at Halloween parties or conventions?
Many venues prohibit realistic weapons, require prop weapons to be clearly fake (bright colors, rounded tips), and cap prop length. Check the event’s prop policy before building, and when in doubt, build a stylized version no one could mistake for real.
How do I make accessories safe and comfortable for a child’s costume?
Avoid small detachable parts that could be swallowed, skip anything covering the eyes or mouth, keep props lightweight and short, and attach everything with breakaway velcro rather than tight elastic so pieces pop free instead of catching. Do the wear-test together and watch for tripping over long hems or dragging props.
Can I fix an accessory that breaks the night of the event?
Yes, if you pack the repair kit from step 9: safety pins, super glue, spare velcro, and a small paint pot. Safety pins handle most strap and attachment failures, super glue fixes prop breaks in minutes, and a dab of matching paint hides the crack. Most mid-event failures are fastener failures, which is why adjustable closures matter so much during the build.
Fall Picks
fall essentials
As an affiliate, we earn on qualifying purchases.