
TL;DR
In small closet studios, the key isn’t just adding foam—it’s about controlling reflections, sealing leaks, and strategic mic placement. Placing your rig in a closet with proper ventilation keeps noise away and boosts sound clarity.
Ever noticed how a tiny closet can either sound like a professional studio or just a box of echoes? The secret isn’t just in slapping foam everywhere. It’s about understanding what causes sound issues—reflections and leaks—and tackling those head-on.
This guide will show you how to turn a cramped closet into a sound-friendly zone, whether you’re recording vocals, streaming, or just experimenting. You’ll learn how placement, sealing gaps, and a few smart tweaks make all the difference.
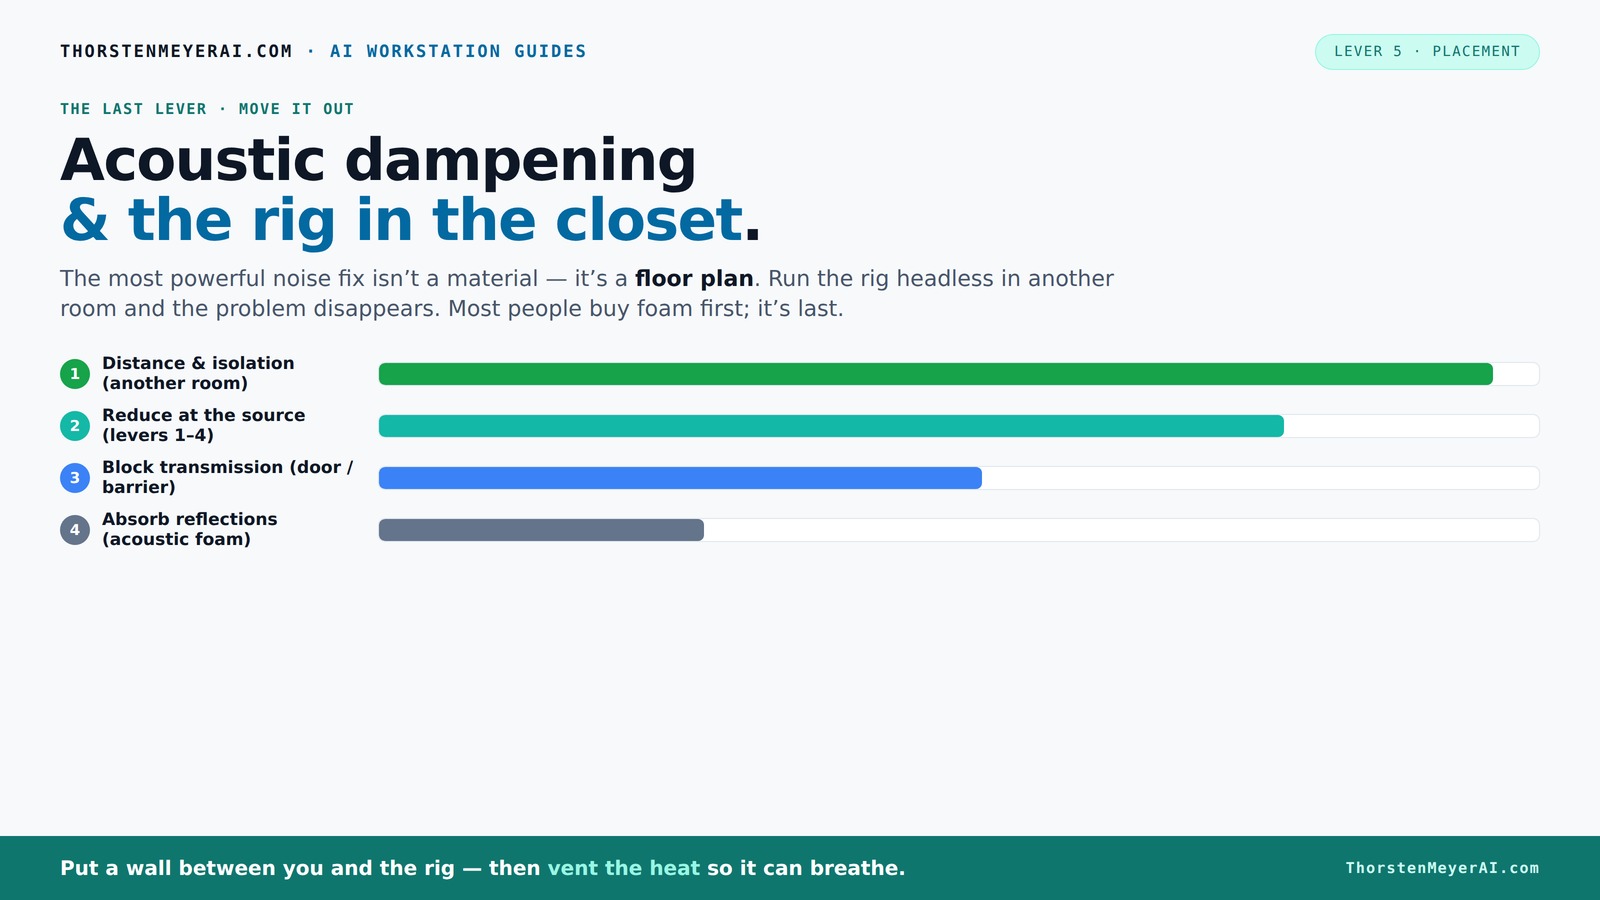
Acoustic dampening
& the rig in the closet.
The most powerful noise fix isn’t a material — it’s a floor plan. A rig you can’t hear because it’s in another room beats any amount of foam. Tap the approaches in Part 1 to see what actually works.
(another room)
(levers 1–4)
(door / barrier)
(acoustic foam)
Contain the noise, not the heat
Key Takeaways
- Focus first on sealing gaps around the door and using mic placement to reduce reflections.
- Moving your rig into a separate room or closet drastically cuts noise—distance is king.
- Proper ventilation is essential in closet setups to prevent heat buildup and fan noise.
- DIY materials like blankets and foam can make professional-sounding booths on a budget.
- Address low-frequency buildup with bass traps or by treating corners, but don’t overdo it in small spaces.

Focusound 52 Pack Acoustic Foam Panels 1" x 12" x 12" Sound Proof Foam Panles Soundproofing Noise Cancelling Wedge Panels for Home Office Recoding Studio with 300PCS Double-Side Adhesive
Soundproofing - Acoustic foam panels triangular grooves structure for better noise absorption, helps to reduce and absorb unwanted...
As an affiliate, we earn on qualifying purchases.
As an affiliate, we earn on qualifying purchases.
Why Small Spaces Can Sound Better Than You Think
Closing yourself inside a tiny closet actually helps reduce echoes because it confines sound, which can make recordings clearer. However, this confinement also amplifies certain frequencies—especially low-end bass—that can create a boomy, muddy sound if not managed properly. Think of it like a mini concert hall: the same reflective surfaces that help contain sound can also cause standing waves and resonances, which distort the natural tone of your voice or instrument.
For example, a YouTuber in a 4x4 closet used blankets, foam, and careful mic placement to get studio-quality vocals without any expensive gear or full-room treatment. This shows that understanding the acoustic environment allows you to turn limitations into advantages by selectively treating problem areas.
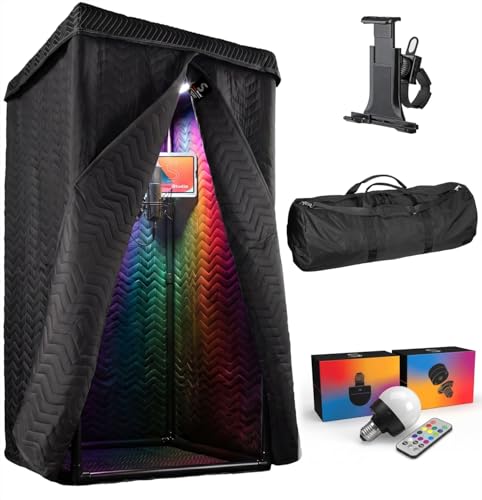
'Snap Studio' XL Portable Recording Booth | '#1 Vocal Booth' Rolling Stone | Record Crisp Dry Echo-Free Vocals at Home or On-The-Road | The Original & Best Studio Booth, Trusted By Singers & Voiceover
#1 Recommended Portable Recording Booth — Featured by Rolling Stone Magazine as the “best sound booth”, Snap Studio’s...
As an affiliate, we earn on qualifying purchases.
As an affiliate, we earn on qualifying purchases.
The Big Difference: Dampening vs. Soundproofing
Acoustic dampening, like foam and blankets, works by reducing internal reflections and controlling reverberation within the room. This makes recordings sound more direct and less echoey. Soundproofing, on the other hand, involves adding mass and sealing gaps to prevent sound from escaping or entering—it's about isolation. For instance, sealing the door with weatherstripping and adding a thick blanket over it prevents sound from leaking out, which is crucial if you want to keep noise from bothering others or external sounds from contaminating your recordings.
Properly understanding these differences helps you prioritize your efforts. If your main issue is echo and muddiness, focus on dampening. If noise leakage is a concern—say, recording late at night or in shared spaces—then soundproofing becomes essential. Often, a combination of both yields the best results, but knowing which to emphasize depends on your specific environment and goals.

Dmsky Microphone Isolation Shield with Pop Filter & Tripod Stand, Foldable Mic Shield with Triple Sound Insulation, High Density Mic Sound Shield for Recording Studio, Podcasts, Singing, Broadcasting
【Excellent noise reduction】Triple Sound Insulation,foldable Microphone Isolation with reflective layer+filter layer+absorbing layer.the high-density acoustic foam that eliminates audio...
As an affiliate, we earn on qualifying purchases.
As an affiliate, we earn on qualifying purchases.
Where to Place Your Microphone for the Best Sound
Your mic placement is everything because it directly influences the clarity and quality of your recordings. Position it so that it captures your voice directly and minimizes the influence of room reflections. The first reflection point—usually the wall directly behind the mic—is where sound bounces back toward the mic, creating comb filtering and coloration. By treating this spot with absorption, you prevent reflections from muddying your sound.
For example, in a closet, placing the mic 6-12 inches away from the wall and angling it slightly can significantly reduce room noise and reflections. Using a mirror to locate the first reflection point ensures you're treating the most problematic area. This targeted approach maximizes your sound quality while using minimal treatment materials, making your setup more efficient and effective.

118” Wedge-Shape Foam Window Weather Stripping Door Seal Strip,Soundproofing Frame Winter Insulation Tape for Exterior Front Door,Noise Cancelling Window Inserts,Door Gap Filler Light Blocker,White
Upgraded Wedge Design: This window draft stopper features an upgraded wedge design, tapering from 5/32" to 11/32" (0.16"–0.35")...
As an affiliate, we earn on qualifying purchases.
As an affiliate, we earn on qualifying purchases.
Sealing the Door and Gaps — The Hidden Superpower
Sound leaks through gaps under doors and around frames, which can undermine your entire acoustic setup by letting noise escape or external sounds intrude. Sealing these gaps with weatherstripping, draft stoppers, or acoustic seals instantly cuts noise bleed and improves isolation. This simple step is often overlooked but can dramatically improve soundproofing—reducing sound transmission by over 20 dB with just a few materials.
For example, hanging a moving blanket over your door and sealing any gaps with weatherstripping turned a noisy closet into a near-silent booth. This not only blocks sound but also prevents echoes from bouncing around, creating a more controlled environment conducive to professional-sounding recordings.
Remember, even small leaks can significantly degrade your sound quality and privacy, so addressing these areas is a cost-effective and impactful step in your studio setup.
Treating Walls, Ceiling, and Floor — The Order of Priority
Start with reflection points—walls and ceiling—using foam, blankets, or DIY panels. These are the primary sources of echo and reverberation in small spaces. Next, treat the floor with rugs or carpets to reduce bounce and vibrations, which can cause muddiness in recordings. Corner bass traps help tame low-end buildup and standing waves, but in very small closets, they may be overkill unless you notice significant booming sounds.
In a recent DIY build, a creator added foam on walls, a thick rug on the floor, and corner traps, which drastically improved clarity and reduced muddiness. The key is to prioritize treatments based on the specific acoustic problems—starting with reflection points and then addressing bass issues if necessary. This step-by-step approach ensures efficient use of materials and better overall sound quality.
DIY Materials That Save You Money and Still Work
Blankets, foam panels, and even mattress toppers can double as effective sound absorbers. Heavy quilts or moving blankets are excellent for sealing gaps and blocking sound leaks because they add mass and density without extra cost. DIY bass traps made from Owens Corning foam or old pillows can help tame low frequencies—these are often the most problematic in small rooms—without requiring expensive commercial solutions.
For example, a streamer used old comforters and a few foam panels to craft a makeshift booth that rivaled commercial solutions. The key is to understand which materials absorb high frequencies and which are better for bass, allowing you to customize your setup based on your specific needs and budget.
Ventilation and Heat — Keep Your Rig Cool and Quiet
Running a high-power rig in a closet means heat buildup, which can cause hardware to throttle and fans to work harder, increasing noise. Proper ventilation is crucial to maintain safe temperatures and reduce noise from cooling fans. Use passive vents, small exhaust fans, or ducted airflow to keep temperatures down. A sealed closet without airflow traps heat, causing fans to run constantly and amplifying noise.
For example, installing a quiet exhaust fan and a vent hole helped keep a closet-based rig cool, preventing throttling and loud fan noise. Balancing ventilation with acoustic treatment is key—too much airflow can introduce noise, so choose quiet fans and strategic vent placement to maintain both temperature and sound quality.
The 'Rig in the Closet' Setup — Is It Good or Bad?
Placing your rig in a closet is a smart way to isolate noise from your environment, especially if you’re working late or in shared spaces. The key to success is ensuring proper ventilation; sealing the closet tightly without airflow leads to heat buildup, which can damage hardware and increase fan noise. Using fans, vents, or a dedicated cooling system keeps temperatures safe and noise levels manageable.
One creator moved their GPU mining rig into a closet with a small exhaust fan and a vented door. The result? Quiet workspace, cool hardware, and no complaints from neighbors. This demonstrates that with the right setup, a closet can be an effective and efficient environment for your rig, provided you address heat and airflow issues thoughtfully.
Troubleshooting: When Your Closet Still Sounds Off
If you hear echo or low-end boom, it’s time to add more absorption or bass traps, especially in corners where low frequencies tend to accumulate. For persistent noise leaks or external sounds, reinforce door seals and consider an additional layer of soundproofing material—like mass-loaded vinyl or additional blankets. These steps help contain sound and improve overall acoustics.
For example, a podcaster fixed echo issues by adding foam on the ceiling and behind the mic, plus sealing the door with weatherstripping. These targeted fixes can make a significant difference, turning a problematic space into a professional-sounding booth. Remember, troubleshooting is about identifying the specific problem—whether it’s reflections, low frequencies, or leaks—and applying the right solution.
Frequently Asked Questions
Do I need acoustic foam or just soundproofing materials?
Both serve different purposes. Acoustic foam reduces echoes inside your space, making recordings clearer. Soundproofing materials seal gaps and block sound leaks. For small closet booths, a combination of both often works best.Where should I put the microphone in a closet booth?
Place the mic about 6-12 inches away from the wall behind it, aiming away from reflective surfaces. Use a mirror or a reflection test to find the first reflection point and treat that spot for cleaner sound.How do I prevent heat from building up in my closet rig?
Use passive vents, quiet exhaust fans, or ducted airflow to keep air moving. Never seal the closet completely—heat trapped inside can throttle your hardware and create noise issues.Should I treat the corners or the walls first?
Start with the reflection points on walls and ceiling, then add bass traps in corners if you notice low-end boom. Focus on the areas that impact your specific sound issues.Can a closet booth sound professional?
Absolutely, if you treat reflections, seal gaps, and manage heat properly. Many creators achieve studio-quality sound in tiny, DIY setups with a little effort and smart placement.Conclusion
Turning a closet into a mini studio isn’t magic; it’s smart planning. Prioritize sealing gaps, placing your mic carefully, and providing airflow for your rig.
Think of your tiny space as a musical instrument—if you tune it right, it can produce studio-quality sound without costly equipment or full room renovations. Your best move? Keep the rig in a closet, but treat it like a little masterpiece—focused, ventilated, and well-sealed.